Render is like an outer shell to a building. It’s usually made from cement, but you can also get silicone and lime renders (which can be a bit more difficult to paint). Painting your render isn’t just about the way it looks; it’s also about protection. Think of the paint as a barrier that keeps moisture and the other elements out of your home.
In this blog, I’ll explain everything you need to know about how to paint render based on my own experience as a painter and decorator. I’ll talk you through everything from the tools and paint needed, to the step-by-step process, and a few hints, tips and recommendations. Follow the process properly and use good-quality materials and you won’t go far wrong.
Tools and Materials
- Access equipment
- Fungicidal wash
- Dust sheets
- Plastic sheeting
- Masking tape
- Masonry Filler
- A good-quality masonry paint (more details later)
- A long-pile roller
- Roller pole
- A stiff paint brush
- Scuttle
How to Paint Render – Step-by-Step Process
Assess the Render
You need to have a look at the render to assess what needs to be done. If your render is new, then you’ll need to wait 4-6 weeks for it to cure before you can paint it. If your render is previously painted, you need to check for flaky paint, hairline cracks, algae etc. If you have silicone or lime render, then you will need a specialist paint system. Knowing what you’re dealing with is the secret to knowing how to deal with it!
Clean the Surface
Remove dirt, treat algae with a fungicidal wash (such as Dulux Trade Weathershield Fungicidal Wash), and scrape at loose paint to remove as much as you can. Some people pressure wash render before painting it, which cleans and removes flaky paint. However, I’m not a fan of this because it saturates the surface and you need to wait for it to fully dry before you can proceed.
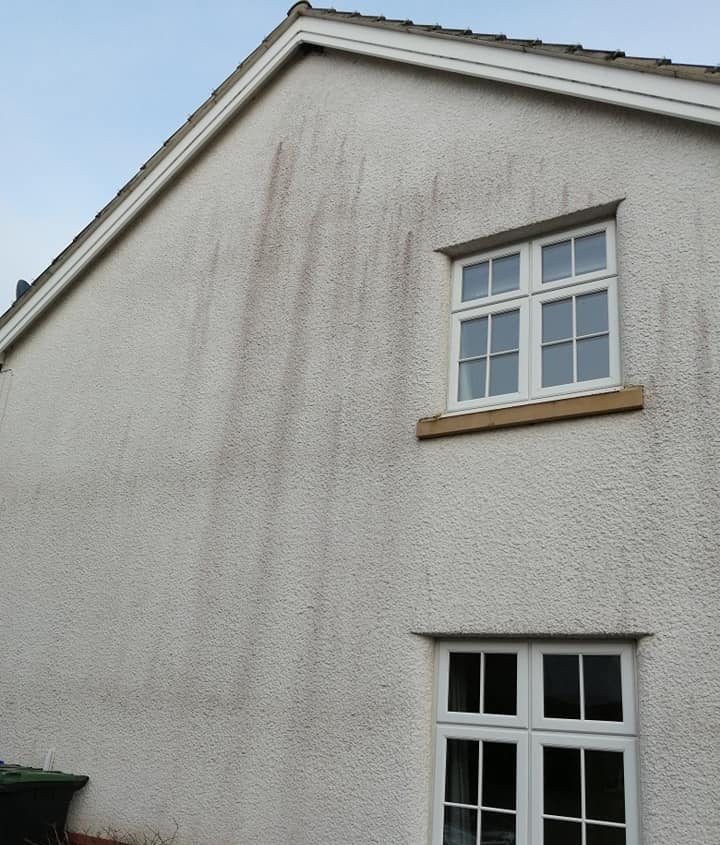
The image below shows textured render with red algae growing on it. All you need to do in this instance is apply a fungicidal wash and leave 24 hours for it to do its thing. Then you’re ready to paint. You can read more on how to clean render before painting here.

Sheet Up
I know this is an obvious one, but you will need to cover the floor where you’re working with tarpaulin or dust sheets. You will also need to cover windows and doors with plastic sheeting and masking tape, otherwise they’ll get covered in spots of paint.
Move nearby cars or anything else of value, because droplets of paint can travel quite far, especially if it’s windy. Anything in the vicinity that can’t be moved should be covered, especially downwind.

Repair
Carve out and fill hairline cracks or chips in the render using a good-quality masonry filler such as Toupret Rock Solid Filler. Stabilise any newly exposed bare render and chalky surfaces using a stabilising solution such as Dulux Trade Weathershield Stabilising Primer or Emperor Primer. Remember that the prep is often the most important stage, so don’t cut corners. You can read more on how to fill and repair rendered walls here.

Choose the Right Paint
I’ll look at the best paints to use a little later. However, regardless of whether you take my recommendations, you do need to put some thought into it. Otherwise, the paint on your render will fail after a short period. Using a quality paint is the difference between needing to repaint after 2 years, or 25 years, so it’s often worth paying a little more for your materials.

Apply the First Coat of Paint
Some masonry paints require a coat of primer on bare render before you can apply the first coat of paint. Check the instructions online before applying the paint and apply a coat of primer if needed.
Then you’re ready to apply the paint. I often dilute the first coat to help with flow and reduce defects like picture framing. Start at the top of your building, cut in with a brush around the edges, windows, doors, drainpipes, etc. Then use a long-pile roller to apply the paint to the rest of the render. Work the paint right into every crack and crease to ensure thorough coverage (which means thorough protection for the render).
Apply a Second Coat
The second coat is normally easier to apply. Allow the first coat to fully dry (follow the recommended recoat time) and then follow the same process you did with the first coat.
Choosing the Right Paint for your Render
As I’ve already mentioned, it is really important to choose the right paint for the job. As a decorator, I sometimes wince in disbelief when clients insist on using cheap retail paints. There’s a lot of hard graft involved in painting render, so an extra few quid on paint is worthwhile if it means you get an extra 5 years out of the finish.
If you have normal cement render, then a standard trade masonry paint can be used. If it’s silicone or lime render, then you will need a silicone- or mineral-based paint. I have a couple of recommendations for you; the first I believe to be the best standard trade masonry paint right now, and the other is a high-end silicone-based masonry paint that can be used on almost any type of render.
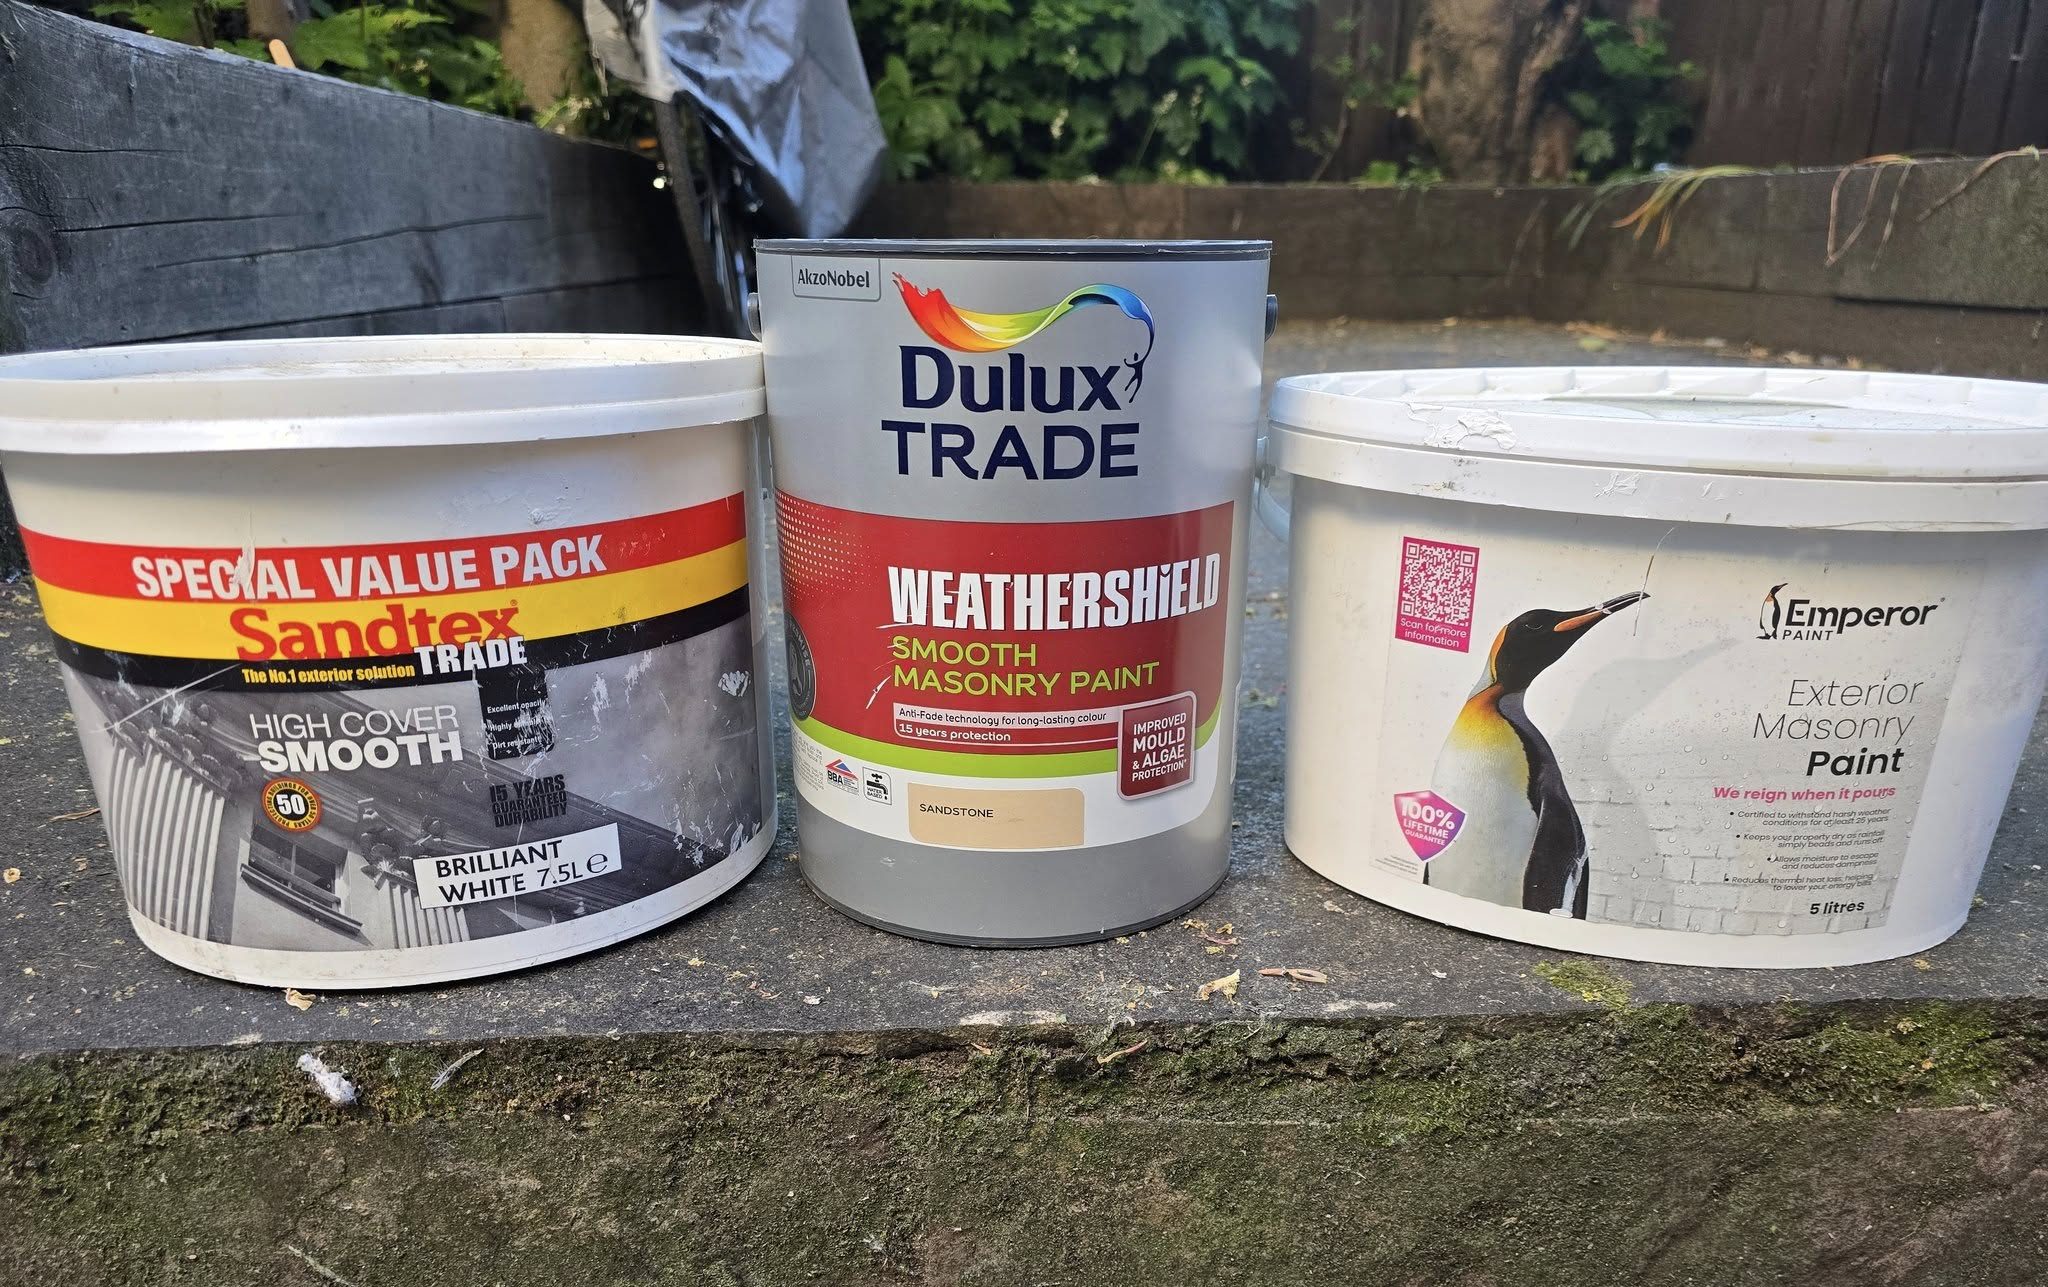
Dulux Trade Weathershield Masonry Paint
This is probably the most popular masonry paint amongst professional decorators. It comes in a great range of colours, and the opacity is great, meaning that even if you have a dramatic colour change you shouldn’t need too many coats to achieve it.
Dulux Trade Weathershield is not ridiculously expensive, which helps a lot, especially on larger exterior projects! This paint is ideal for most normal render projects, but it’s not suitable for silicone or lime render.

Emperor Exterior Masonry Paint
This is far from the cheapest on the market, but that’s because it offers a whole host of additional benefits on top of simply looking fantastic (which it does, by the way — with a lovely, rich, flat matt finish).
As well as being fully breathable — making it ideal for older properties and lime renders, for example — it is also hydrophobic, meaning that moisture literally runs off it.
Not only does this combination of factors help to keep moisture and damp problems at bay, but it also makes your render more resistant to mould and algae, while offering better protection against the development of hairline cracks (which can be caused or worsened by the “freeze–thaw cycle” when moisture penetrates the surface).
Oh, and it retains heat too, meaning you need less energy to keep your house warm.
The combination of all of these factors means that with Emperor Masonry Paint your render will stay looking amazing for far longer, so in the long term it may actually save you money.

Hints, Tips and Mistakes to Avoid When Painting Render
- Avoid painting in direct sun, rain, or freezing temperatures.
- Don’t paint new render too early – you need to allow the render to fully cure before it is painted.
- Don’t skip the primer if the render is chalky or powdery, otherwise your paint is trying to adhere to something that will probably flake off soon – a good stabilising solution will solve these problems.
- Always check the weather forecast – there’s nothing worse than getting all your tools out, sheeting up, and then being caught in a downpour which lasts all day.
Troubleshooting Common Render Painting Problems
I thought it might be useful to include a little section on the problems, causes, and solutions you might come up against when painting render. Feel free to skip this section if everything goes smoothly (you can always refer back if your painting starts to put up a fight).
Cracks in the Render
Cause: Movement in the wall caused by weathering or settlement.
Fix: Carve out any cracks and apply a cement-based filler. Allow plenty of time to cure before painting over.
Rust Stains Bleeding Through the Paint
Cause: Usually metal fixings or broken nails in the render.
Fix: Remove some render to expose the metal (if you can without causing too much damage), apply a generous coat of metal oxide primer, fill the imperfection, then paint.
Green or Red Algae or Black Mould Stains
Cause: Fungus growing due to moist conditions.
Fix: Treat with a fungicidal wash or a product like Emperor Masonry Cleaner. This will kill the mould and remove the stain.
Peeling or Flaking Paint
Cause: Usually caused by moisture trapped under the paint film, leading it to fail over time.
Fix: Strip back, stabilise, then apply a breathable paint such as Emperor Masonry Paint.

FAQs
Can I paint over painted render?
Absolutely! But make sure you follow the steps outlined above, especially in terms of assessing the render and carrying out any necessary prep thoroughly.
How long does masonry paint last?
If the surface has been prepared thoroughly and a good quality trade masonry paint has been applied properly, you should expect the paint to last up to ten years. It’s hard to be precise because it will depend to some extent on the weather conditions, proximity to the sea, etc. With Emperor Masonry Paint, the lifespan can extend to twenty-five years, so although it’s expensive, it will save you money by reducing the number of times the building needs to be painted.
What if my render is cracked or flaking?
Cracks should be properly filled/repaired as described in our separate blog here. Any flaking paint should be removed, and the area treated with a stabilising solution prior to painting.
How long should new render dry before painting?
As a rough guide, you should wait 24 hours for every 1 mm of render. However, the curing time can be longer in cold weather. I tend to insist on waiting at least 2 weeks before painting.
Do I need to use a stabiliser before painting render?
You only need to use a stabilising solution if the substrate is chalky. If not, you’re good to go with your paint system. Most masonry paints can be applied directly to render, while some require a primer.
Final Thoughts
Painting render isn’t difficult, it just needs a methodical approach, following the process outlined above. Don’t skip the prep, make sure you choose the right paint for the job, and if you are working at height, make sure you are careful to follow the safety measures recommended for whatever access equipment you are using.
What Other Decorators Think
I would always have a good walk around and inspect the render for cracks, holes and algae growth. Then I would look onto good quality exterior fillers like Toupret Render Repair Filler.
As for any green growth, you could jet wash the areas down if the render can take it. Then I would apply a coat of Emperor Paint Masonry Cleaner, follow instructions to this and wear a mask and gloves.
And as for paint, I would use Emperor Paint Masonry Paint — they do the standard white and a few creams and stone colours as well as a couple of dark colours. Apply 2 coats as required, leaving the appropriate drying time before recoats.
This paint is highly breathable, hydrophobic, and has good heat-retaining qualities. Plus, if it’s done to manufacturer spec, it has a lifetime warranty. If you have new/bare render, then I would also use Emperor Paint Masonry Primer before your chosen colour top coat.
Always make sure you have everything sheeted up and protected and have an area for mixing the paint and to strain it. I recommend using a Zeeke Tools Tough Net for this, and a good-size wash bucket to put brushes and rollers into when finished. I always use Pretty Boy Products Cleaner in the bucket of water — best stuff for cleaning 👌.
Always check the long-range forecast, liaise with customers beforehand in case you can’t work through rain forecast. I get customers to move vehicles, plus neighbours, as paint can spray across without realising you’ve given the car a respray.
Always bring plenty of sheeting and plastic for covering pathways, plants and porch roof etc. Heavy-duty roller sleeves for sealer if required and paint, 2 good coats. On 2nd coat use covers for tops of ladders to avoid marking the walls. If scaffold is required, I give customers reputable companies’ details and get them to arrange it — saves you forking out beforehand. Same with cherry picker or scissor lift. I advise on Dulux Weathershield being used.
Stabiliser is a must, whatever the project. No such thing as not enough protection, i.e. don’t forget about them bloody sills.
(Said it a few times over the summer.)
The key thing about painting render is to understand the type of render and the type of wall.
Traditional solid walls with 20th-century lime/cement render need a breathable (vapour permeable) paint to avoid trapping moisture which can cause problems with damp and condensation inside. Old, impervious finishes need stripping first to allow the breathable product to function correctly.
In some cases of historic properties where lime renders have been used for conservation or damp remediation purposes, then only traditional mineral finishes like limewash or silicate are suitable.
Older cavity walls have often been rendered to reduce weather penetration through the thin outer brickwork and can tolerate conventional masonry paints with less breathable characteristics.
Modern specialist renders, e.g. silicone, have their own characteristics and need a paint made specifically for the purpose.
It’s always necessary to understand the moisture transport properties of both the existing wall and the paint type to be used.


0 Comments