

As a professional decorator, I meet all kinds of customers! There are the decisive ones, and there are the terminally indecisive ones (I’m in the middle of a job for one of these now; it took two years between me doing the quote and them deciding the colour!).
Most customers are somewhere in the middle; they have a vague idea of what they want but haven’t got beyond that. This is where paint testers come in handy – they allow the customer to see the actual paint in their room, without the expense of buying a 5L tin of paint.
Paint samples or testers generally come in small tins – around 250ml is the norm. Recently, some companies (such as Lick, COAT and Graphenstone, for example) have introduced an alternative to paint tins, and provide sheets of paper/card. These are pre-painted in your chosen colour and have a low-tack adhesive on the back, so that you can stick them up in your room.
This is a lot more environmentally friendly, but both approaches serve the same purpose; to allow you/your customer to see the actual paint in the room where it will be used, without the cost of a full tin of paint.
In this blog we’ll look at how to get the best out of paint testers (in either format), some dos and don’ts of using them, and what other tools are available to help you and/or your customer choose the perfect colour for the room.

What Other Tools Can Help Choosing Paint Colours?
Before we get into the detail of how, where and why to use paint testers, let’s take a quick look at some of the other tools that we use to help customers arrive at a decision on their paint colour.o they are well worth the small outlay.
Colour charts
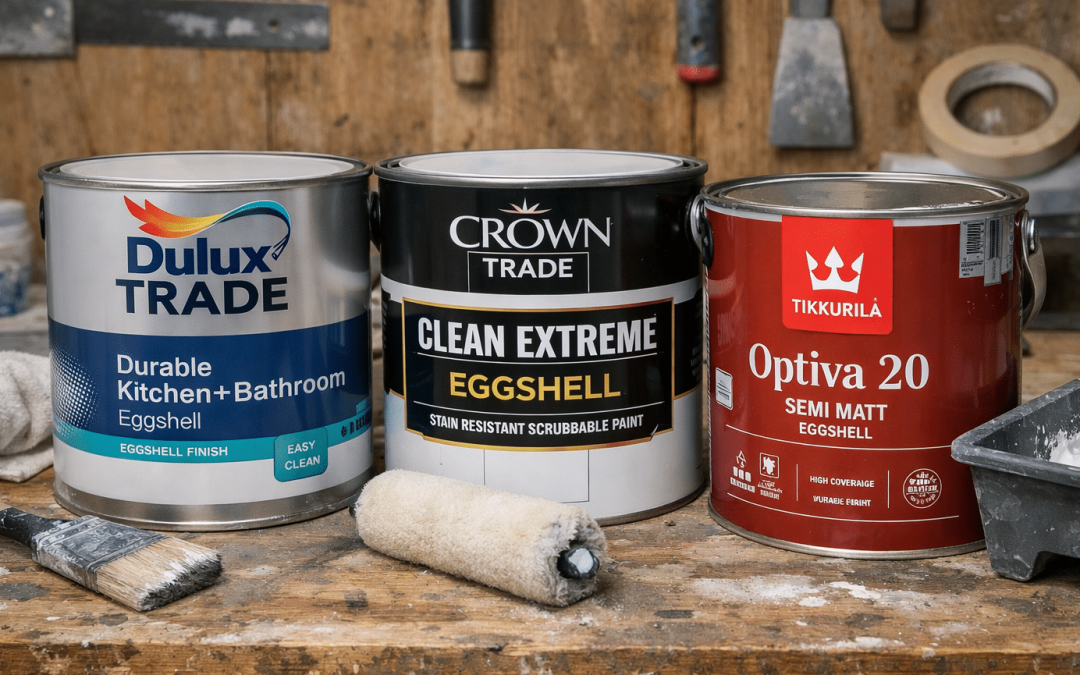
These are provided free of charge by all the paint manufacturers. For the high-end designer brands, they contain all their available colours. For the mainstream brands like Dulux, Crown, Johnstone’s and Tikkurila, they contain a fraction of their colour range. In any event, it helps narrow the choice down; using colour charts we can usually get to a situation like “I’m thinking somewhere between A and B”.

Fan decks
These have a much broader choice of colours. The colour charts are a marketing tool – they contain the colours which the manufacturers think will have the strongest appeal to people, but there are a lot of shades that aren’t represented.
For example, a colour chart may contain twenty shades of green, but only three oranges. A fan deck has literally hundreds of choices, usually with slightly lighter and darker options of the same basic colour arranged on the same page, to make life easier.

Visualiser apps
Apps like the Dulux Trade Visualizer, are a bit more high-tech! They allow you to take a photo of your room and then change the colour of the walls (or ceiling or woodwork) to your chosen colour in the photo. It’s never perfect, but it will give you a “broad brush” impression of what the room could look like in that colour.
If you want to match a specific colour (e.g. your curtains), read our separate blog here
Why Use Paint Testers?
Once you have used the tools above to narrow the choices down to two or three shades, this is the stage when paint testers come in handy. There are a few good reasons for using them:
It’s the actual paint you’re using!
Most importantly, they allow you to see the actual paint itself in the room (not a tiny square of colour printed onto a colour chart). Seeing the actual colour in situ, next to the carpets and furniture, gives you a much clearer idea of what the room could look like. You can look at the colour in daylight, with the curtains closed, with the electric lights on… basically, you can live with the colour for a couple of days and make sure it works for you in the way that you hoped it would
Using paint testers helps avoid costly mistakes
Yes, there is a small outlay to buy them, but it’s a lot less than the cost of a 5L tin of paint (and your decorator’s time painting it onto your walls), only for you to say that it’s not quite right.

Where to Buy Paint Testers
My customers often pick up paint samples from the major DIY chains. There are two problems with that:
- Each DIY store will only have the samples of the colours they stock, not the full range of shades that you will see in a fan deck. They will also only have samples from one or two manufacturers, not the wide range of brands that are available online.
- In some cases (I won’t name brands, but it has happened to me) the colours of the retail paints don’t match the colours in the trade paint, and if you want the best results, then you should be using trade paint for your project. So, for example, a customer of mine bought a sample in B&Q, decided that that was the colour she wanted, so I went to the appropriate decorators’ centre and bought that colour, mixed into trade paint… and it didn’t match (probably because the base formulations are different). So now, whenever possible, I try to provide paint testers for customers, because I know where they have come from.
- With that in mind, the best place to get paint testers is from the place where you intend to buy the paint. So, for Dulux, I’d go to my nearest Dulux Decorator Centre. For Crown, I’d go to my local Crown Decorator Centre, and so on. If you have a Tikkurila stockist nearby, go there, or if not, you can order samples from them online. As mentioned earlier, Lick, COAT and Graphenstone will send you pre-painted self-adhesive colour swatches, you just order them from their website.
How to Use Paint Testers
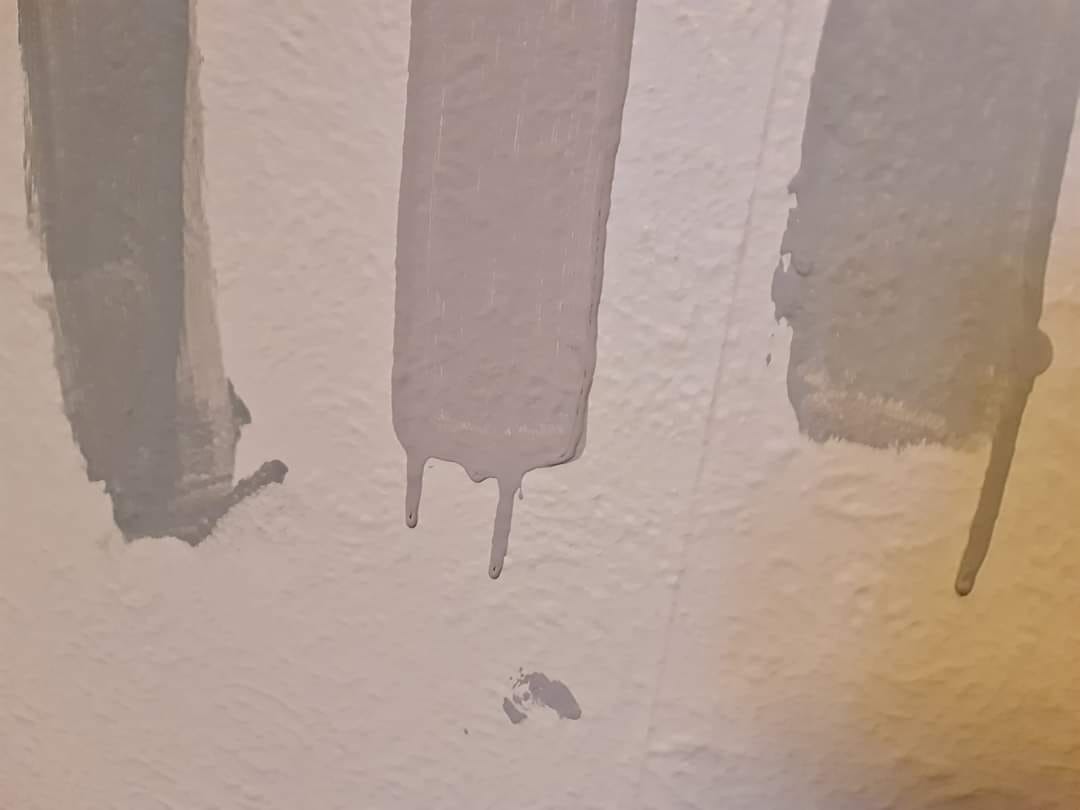
Once you have narrowed your choices down to let’s say 2-4 colours, go ahead and buy your samples. I try to discourage my customers from painting splodges of colour all over the walls. Apart from anything else, the brush marks can be horrendous, and it takes me ages to make the walls smooth again before painting.
So, I like to take the samples home and paint them onto squares of lining paper and provide these to the client. The beauty of this is that they’re not fixed to one place – they can be moved around the room where the lighting is different, placed next to the carpet or the sofa to see how well the colours go, or taken by the customer to the shops when they want to find curtains or other accessories that will go well with their new walls. And no splodges of paint for me to sand smooth!

OK, there’s a bit more work in preparing the colour swatches, but it probably takes no more time than sanding down the paint splodges. Oh, and always remember to write the name of the colour on the back!
Look at them in different lights, at different times of the day, natural light vs electric light. Move them around the room, as they will look different on different walls. Consider how they go (or don’t!) with the carpet, furniture, curtains etc. This is the beauty of paint testers – you try the actual colour in the actual room.

A Few Dos and Don’ts when using Paint Testers
DO:
- Label your swatches carefully with the brand and name of the colour.
- Take your time, look at the colours in different lights, different times of day and on different walls.
- Limit your choices to ideally 2-4 colours, 6 at most. Any more than that is too much to think about!
- Buy your paint testers from the same place you will be buying the paint.
- Apply two coats of paint – that’s what will go on the walls, and one coat won’t have the full depth of colour.
- Try to look at the samples against a neutral background – if you place them against a strong contrasting colour, it will change your perception of the colour.
DON’T
- Splodge 24 different colours all over the walls – your decorator will hate you!
- Rush your decision – take your time to look at the colours at different times of the day, as the light will change your perception of the colours. Equally, don’t take two years, please!

Final Thoughts
Paint testers are a great tool. Used correctly they can help you visualise better than anything else what your room will look like, because you can see the actual paint in your room, in different lighting conditions. And they can save you from a potentially disastrous (and costly) mistake, so they are well worth the small outlay.


0 Comments