


Paint rollers – while the “man in the street” probably never gives them a second thought, for professional decorators like myself they’re an absolutely essential bit of kit. I rarely go a day without using one, certainly never a week.
I try to look after mine; I know they won’t last forever, but if I can keep them well-maintained they not only last longer, but they also give a better result. And the less often I must throw one away and replace it, the less waste goes into landfill, and the less money I have to spend, so knowing how to look after a roller sleeve is pretty important (to me, anyway!).
Having said that, I don’t always clean them. If I have a really dark colour to paint, I sometimes use a roller sleeve that’s nearing the end of its life anyway, and throw it away, as getting it clean always feels like an impossible task.
Also, if I’m using a 4” foam roller for painting oil-based gloss, for example, I think of these as disposable, as trying to clean them with white spirit is messy and frankly not worth the effort when they only cost £1 or so; weigh that up against the time you’d take cleaning one, the mess, and the cost of the white spirit.
The other time I don’t clean my rollers is if I’m using the same paint the next day; that’s a waste of time and money. Simply wrap them securely in clingfilm to prevent the air getting to them, and they’ll be fine to use the following morning.
But most of the time I clean my rollers at the end of a job – it’s not my favourite job, but it has to be done. In this blog I’ll take you through the process that’s worked for me over the past twenty years, and keeps my roller sleeves in good condition and helps them to last a bit longer.

Tools and Materials Needed for Cleaning Paint Rollers
- Scraper, putty knife or special cleaning tool (see below)
- Old cardboard or newspaper
- Clingfilm
- Bucket of warm water
- Mild detergent (I use Pretty Boy Brush Cleaner, as it was specifically developed for the job)
- Gloves if you prefer
Cleaning a Roller Sleeve – Step-by-Step Process
Scrape the roller
The first job, as soon as I know I’ve finished using the roller, is to get as much paint out of it as possible. You can use a scraper or a putty knife, but I like to use this tool made by Purdy.
Simply scrape as much paint as you can from the roller back into the paint tin to use another day. The first time you do this you’ll be amazed at how much paint you actually squeeze out of a roller!
Doing this step first not only saves you a bit of time later, it saves you money as there’s less paint wasted, and is also better for the environment, with less paint going down the drain, and less water used in the cleaning process.

Roll over cardboard
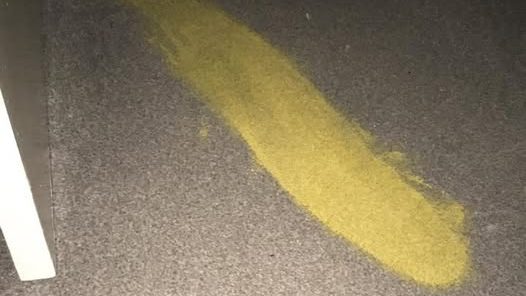
You can also roll the roller on a sheet of cardboard or newspaper to remove more paint from it if needed
If you’re working at home you can skip this step, but if you’re travelling home from a job, wrap the roller securely in clingfilm until you are ready to wash it out, as this will stop it from drying out.
Rinse the roller
For the next step, some people prefer to rinse the roller in a sink under the tap, while others prefer to do the cleaning using a bucket of warm water. Either way, it’s a case of removing the sleeve from the roller frame, and then “massaging” the sleeve with your hands, working from the centre towards the ends, to squeeze the paint out.
Personally, I usually do this once to remove the majority of the paint, then rub in some Pretty Boy Brush Cleaner into the nap, and leave the roller to stand for five minutes, before rinsing again until the water runs clear. The Pretty Boy not only helps with the cleaning, but it also leaves the rollers really soft.
Remove the water from the roller
Once you are confident that you’ve removed all the paint, gently squeeze out excess water. To get the roller sleeve dry, you can put the sleeve back on the frame. With the roller in an empty bucket, spin it to remove more of the water (forgetting to use a bucket at this stage will get you and your surroundings very wet and messy!).
Then remove the sleeve again and stand it upright on something that won’t matter if a bit of painty water drips on. Or you can thread string through and hang them up to dry. The important thing is that it’s best not to lie them flat when drying them, as that can squash the nap down on one side, and you may then get an uneven result next time you use them.

When To Replace a Roller Sleeve
Although I have stressed the importance of cleaning your rollers to extend their lives, there comes a time for any roller sleeve when unfortunately, cleaning is no longer going to revive it, and it needs to be replaced.
If a roller starts shedding fibres, it has to go, as you don’t want to be forever picking out “bits” from your paintwork. Similarly, if a roller sleeve is getting really worn, it won’t give you the consistent finish that it did when it was new.
If paint has dried and hardened on it, it won’t be worth the effort of trying to get it clean – just replace it. I found this one in a cupboard in a rental property I was working in recently (I suspect it belonged to the landlord); it was rock solid, there’s no hope of reviving it, even if I wanted to.
And as I mentioned earlier, if you’ve been using oil-based paint, trying to clean the roller is going to make too much mess and be more time and effort than it’s worth.
Final Thoughts
I’ve heard that in some parts of the world, decorators just throw away their brushes and rollers at the end of each job and buy new ones. To me, that’s not only a waste of money, but also not very environmentally responsible. Yes, cleaning your brushes and rollers properly at the end of a job takes a bit of time and effort, but if you follow the process above, I believe it’s well worth it. My tools help me achieve the results that I strive for every day at work. To paraphrase Trigger from “Only Fools and Horses”, “Look after your roller, and your roller will look after you”.


0 Comments