

An essential part of the prep for any decorating job, prior to starting to paint or wallpaper, is to fill any holes, cracks and other imperfections in the walls and ceiling. Without doing this, there’s no way that your freshly painted wall will look perfect, because no amount of paint will cover a hole in the wall.
Holes come in all sorts of shapes and sizes, and walls may be solid brick/breeze block, or they may be stud walls made of plasterboard. The techniques and materials you need will vary to some extent according to the size of the hole, and what the wall is made of. But don’t worry, it’s not complicated!
In this blog I’m going to share how to go about filling these holes, so that once the wall is painted or wallpapered they will never be seen again. It’s a nice simple step-by-step process – it’s not rocket science, but it’s based on my twenty years’ experience working as a professional decorator, so I hope it proves helpful. Feel free to skip ahead and just pick out the information you need.
Identifying the Type of Hole
For small pin holes, it’s not really important what the wall is made of, and for very large holes it’s probably obvious; if it’s plasterboard you will probably be able to see the void behind the board. If in doubt, give the wall a tap – if it sounds hollow, it’s almost certainly a plasterboard stud wall (or dry-lined), whereas a solid wall will sound…errr….solid.
As already mentioned, holes can range in size:
- Small pin holes often caused by picture hooks etc
- Larger screw holes (often with Rawl plugs in) where larger items such as picture rails or shelves had been fixed to the wall
- Big dents, often caused by doors being opened too far and the handle bashing the wall…and occasionally caused by stroppy teenagers!
- Sometimes there are even large square holes where light switches or electrical sockets have been moved.
- Really large holes in plasterboard are often best-repaired by cutting a new piece of plasterboard to fit, but we’ll come onto this later

Tools and Materials You Will Need for Filling Holes in Walls
- Dust sheets
- Scraper, sharp knife
- Possibly long-nosed pliers and/or hammer for removing Rawl plugs
- Dusting brush and/or vacuum
- Filler – different types are available, we’ll go into more detail later
- Filling knives, possibly a skimming blade for larger repairs
- Sandpaper 120-240 grit, or a dustless sanding system depending on how much filling you are doing
- Paint to “spot prime” over the filler
- For larger repairs, a plasterboard repair patch, or possibly a piece of plasterboard cut to size, some wooden batons, plasterboard screws and scrim tape
How to Fill a Hole – Step-By-Step Process
Prepare the area
Start by moving any furniture, ornaments etc out of the way. Put down dust sheets to protect the floor and any furniture which cannot be removed.

Prepare the hole
Scrape away any loose material or flaky paint around the hole. If there is a Rawl plug still in the hole, you can use any of the following methods:
- Pull it out using long-nosed pliers
- Cut the top off it with a sharp knife, and make sure the remainder is pushed below the surface
- Tap with a hammer until the plug (and a small area of the surrounding plaster) are pushed back 1mm or so below the surround surface

Enlarge the hole
Use a sharp knife to cut away a little around the entrance to the hole to make it slightly wider – this will help you to push the filler properly into the hole, which in turn will help it to adhere better.

Clean
Brush or vacuum any dust or loose material out of the hole; you want your filler to adhere to something solid, not to something that’s loose and may later fall out.
At this stage, some decorators apply a coat of Zinsser Peel Stop. Personally I’ve never seen the benefit, unless the surrounding paint is particularly flaky. If you’re not doing this, it’s often a good idea to dampen the hole prior to filling, especially for larger or deeper holes. Again, this is to help the filler to adhere better to the existing material.

Filling the hole
This step will depend on the size of the hole:
- For small nail holes etc, it’s easy to just skim over them quickly with a little filler on the end of a 1” filling knife.
- For larger holes (e.g. Rawl plug holes), you will need to make a bit more of an effort to work the filler firmly into the hole, before smoothing over the surface with your filling knife. If the hole is deep, it’s probably sensible to leave the fille a little bit “proud”, in case it shrinks back slightly as it cures – you can always sand it smooth afterwards.
What about filling large holes?
For larger holes in plasterboard, a repair patch will save you a lot of time, effort and filler. I use the Gyproc EasiPatches, they’re really simple to use. Simply peel off the backing paper and apply the self-adhesive patch over the hole.
Then use a large filling knife (3-4”) to smooth filler over the top, and a couple of inches either side of the patch. Leave to harden, then sand it smooth and apply another thin layer of filler over a wider area (say 4-6” on each side of the patch) using a skimming blade, feathering the filler out at the edges. Again, leave it to harden and then sand smooth. You may need to repeat this several times, building up layers and sanding them smooth, until the repair becomes invisible. The video below shows the process perfectly.
Video demo
Mike Cupit shows how to fill a large hole in a wall using the Gyproc EasiPatch
If you need to make a larger repair in plasterboard, use a sharp knife and a straight edge to make the hole nice and square. Cut a new piece of plasterboard to fit in the hole.
Cut a couple of wooden batons an inch or two longer than the height of the hole, insert them through the gap and screw them in place top and bottom through the existing plasterboard using plasterboard screws. Insert your new piece of plasterboard into the gap, and screw it to the batons. Make sure that the screws are tightened enough that they sit just below the surface of the plasterboard. You can tape around the edge of your repair with self-adhesive scrim tape, and then skim over the top with filler using a skimming blade.

Allow to set
Different fillers will take different amounts of time, and it will also depend on the depth of the hole, the temperature and humidity…there’s no hard and fast rule, just make sure it is fully cured, otherwise you will ruin the surface when you come to sand it.
Sand
Sand the repair smooth, either by hand or with a dustless sander, and make sure you wipe away any dust you create.

Spot prime
This step is often overlooked, but is important. The fresh filler you have used will have a different chemical make-up, surface texture and porosity (absorbency) than the painted walls around it. If you simply paint straight over it, the repair will often “flash”, i.e. be visible through the paint from certain angles and in certain lights.
You don’t need to buy a special primer or anything to do this though; simply mix up a little of your chosen top coat paint with a small amount of water in a paint kettle, and paint over all your repairs with this. Allow it to dry, and then apply two full coats to the walls as normal. This step is just as important if you’re wallpapering; the filler is super-absorbent, and will suck all the moisture out of your paste before it has had a chance to adhere properly, so you may have problems with the paper not sticking.

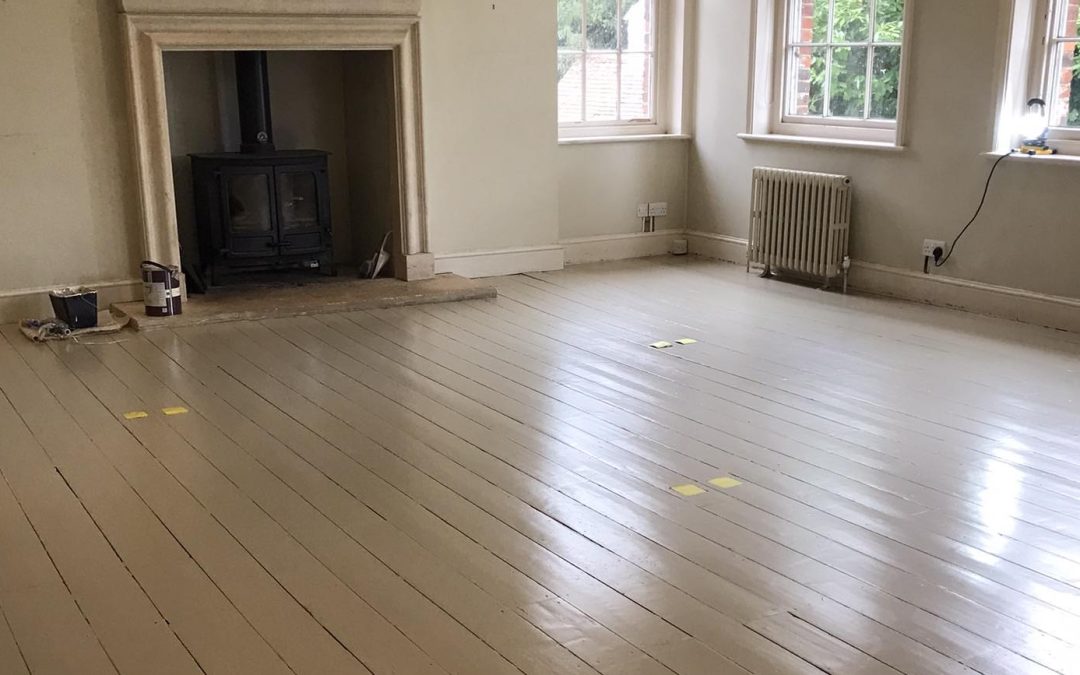
Above photo is the same wall as the opening photo in this blog, after a repair was made using a Gyproc EasiPatch and EasiFill. I challenge you to spot it!
The Best Tools and Materials For Filling Holes in Walls
These are my recommendations based on the tools and materials I use for this type of job every day.
Best general purpose filler
Gyproc EasiFill. This is a powder filler, you mix up the amount you need with cold water, so you can also vary the consistency to your needs (for example, I like it a bit thicker for deeper holes, and a bit thinner for surface skimming). It’s really nice to work with and sands very easily – has been a favourite amongst professional decorators for years.

Best repair patches
As mentioned above, I really like the Gyproc EasiPatches, because they’re so simple to use and help you to get the job done quickly. Trying to fill really deep holes without one would be problematic because of the amount of filler required and time needed for it to set.

Best filling knives
I’ve had my set of Axus Décor filling knives for years, they’ve never let me down, they do a great job and they don’t rust.
Best skimming blade
A relatively new addition to my decorating arsenal, my Prep Aluflex blade is great! It took me a couple of goes to get used to it, what angle to hold it at, how much pressure to apply, etc, but now I’ve got the hang of it I love it.
It’s probably not worth shelling out for quality blades like this unless you carry out decorating work fairly regularly, because of the expense. However, Prep AluFlex is probably the best in class. Some of the others cost a couple of hundred pounds.

FAQs
What is the best filler for holes in walls?
We normally use Gyproc EasiFill when repairing interior walls. It’s easy to mix, reasonably priced, sands down easily, and doesn’t contain cement, so it’s less likely to flash.
Should I remove Rawl plugs before filling?
You can remove Rawl plugs by tapping a screw in until it grips, then pulling it out again. This normally pulls the Rawl plug with it. Alternatively, you can cut the head off the Rawl plug with a sharp knife.
Why do I need to clean the hole before filling?
Cut around the outside of the hole to remove any loose fibres, then dust or vacuum the inside of the hole to help adhesion.
Should I dampen the wall before applying filler?
Wetting the wall slightly can help if there is loose, dusty material which would otherwise prevent your filler from adhering.
Can I wallpaper over filler?
You certainly can, but seal the filler first; otherwise, it’ll absorb all your paste and the paper won’t stick.


0 Comments