



Wood stains are both versatile and practical and can be used both inside and out. Properly applied, a good wood stain will add both colour and protection to wood, without hiding the natural wood grain.
Paint is opaque, and once it’s applied you don’t really see the wood anymore. Wood stain on the other hand is translucent, so you can see the natural beauty of the wood through the stain. Wood stain can be applied to interior doors, skirting boards, panelling or furniture, or externally on doors, windows, garden buildings, garden furniture, cladding etc. Pretty much any wood surface that doesn’t already have a coating on it (because paint, oil, varnish etc will stop the wood stain being absorbed into the wood).
The exception is that you can add more stain on top of existing stain, although only in the same (or darker) shade – you can’t go lighter, because the old dark stain would show through the new light one.

Choosing a Good Wood Stain
A good quality wood stain will offer protection from the elements (including UV protection), and be flexible, so that it won’t crack or peel as the wood naturally expands and contracts.
Wood stains are available in both solvent-based and water-based formulations. Historically the feeling was that solvent-based stains offered better protection and richer colour, but water-based formulations are improving all the time. The downside of solvent-based wood stains is that they take longer to dry, give off strong odours and high levels of VOCs, and need white spirit for brush cleaning, whereas water-based stains don’t.
When choosing your wood stain, look for a reputable trade brand, check that the stain you have chosen is suitable for the environment where you will be applying it (internal or external), then make your choice of colour and choose between solvent- and water-based products.

Sadolin’s solvent-based version is equally good. If you’re working on raw or damaged timber, you should build up the colour with Sadolin Classic, which is all you need when working inside. If you’re staining exterior timber, you’ll need to finish with a coat of Sadolin Extra, which provides UV protection.

Tools & Materials Needed for the Job
- Dust sheets
- Decorators wipes, or cloth and methylated spirit
- Scraper, sandpaper (possibly dustless sander, depending on the job)
- Dusting brush
- Polyvine Wood Dye in your chosen shade
- Lint-free cloth
- Disposable gloves
- Sadolin Quick Dry Wood Stain in your chosen shade
- Stirring stick
- Synthetic paint brush
- Paint kettle
Follow this guide and watch the companion video for all you need to know about applying wood stain.
- Make sure you have plenty of room to work and put down dust sheets to protect the floor. Remember that wood stain can soak through ordinary cotton sheets, so if you have plastic-backed dust sheets (or plastic sheeting), this is best.
- Wipe down all the surfaces that you plan to stain with decorators wipes or a cloth soaked in methylated spirits, to remove any contaminants which might prevent your stain from being absorbed evenly.
- If whatever you are staining already has stain applied which is flaking, scrape off any loose/flaking stain.
- Sand all surfaces, and remove dust with a dusting brush (or vacuum).

- If the surface was previously stained and some of it has peeled away, you will be faced with wood which is two different colours (some stained, some not). If you just apply stain over the top of this, you will still have this “two tone” look afterwards, because both the stained and unstained areas will have gone one shade darker. So, you need to blend the unstained areas in, using Polyvine Wood Dye. Apply using a lint-free cloth (wearing disposable gloves!) and allow to dry (as per the instructions on the product) before proceeding to the next step. Test on an inconspicuous area first to make sure you have the closest colour match to the existing wood stain.
- Apply your first coat of wood stain. Stir the stain thoroughly and decant what you need into a paint kettle. Using a synthetic paint brush, apply an even coat, working with the grain of the wood wherever possible. Work in small, manageable sections; you will find that the stain is absorbed quite quickly into the wood, so work quickly to complete each section and avoid “overlap” marks.
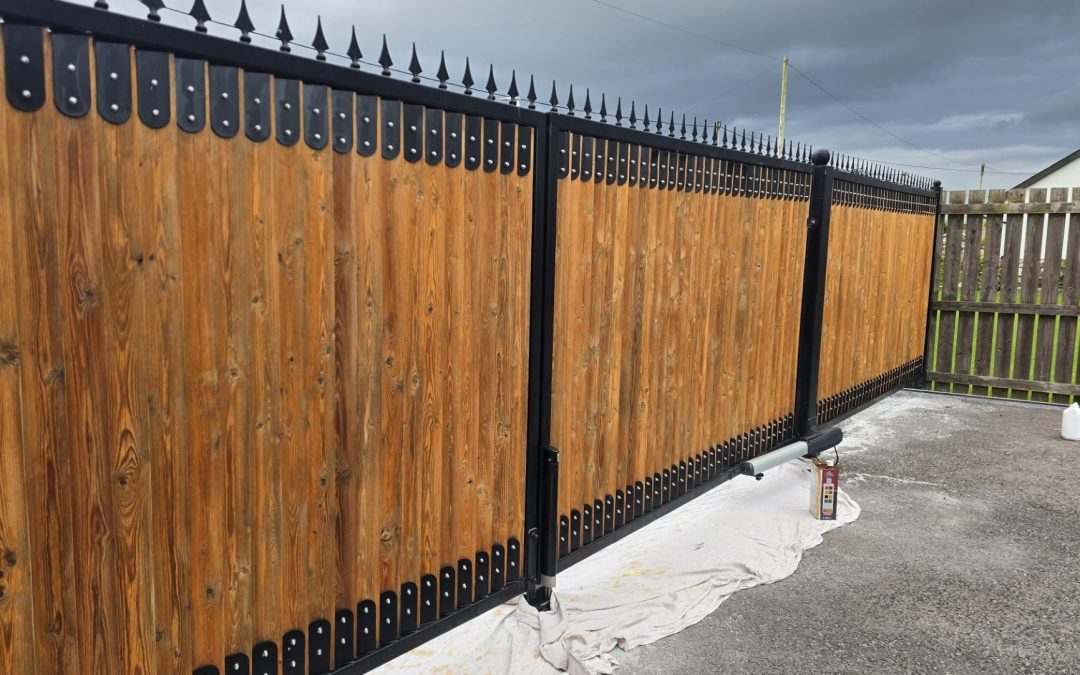
- Allow to dry, following the manufacturer’s instructions regarding re-coat times; if you’re using Sadolin Quick Dry Wood Stain, for example, you need to leave 4-6 hours between coats (so you can get two coats done in a day), but if you’re using a solvent-based product you will need to wait until the next day to apply your second coat. Two to three coats is usually enough, depending on how dramatic a colour change you are trying to achieve. The number of coats can also vary depending on the type of wood, so there is no hard and fast rule. Just keep applying thin, even coats until you’re happy with the colour and the evenness of the finish.


A Video Demonstration
Applying wood stain
Mike Cupit shows how to apply wood stain to previously stained timber.
FAQs
What prep should I do before applying wood stain?
It really depends on the condition of the wood. If you’re applying stain to previously untreated wood, a light sand and thorough clean should be all you need. If the wood is already stained, check if any of the stain is peeling or flaking, and remove loose wood stain. Sand, and then touch these areas up with Polyvine Wood Dye to create a more consistent base colour, before applying your wood stain
How many coats of wood stain should I apply?
There is no hard and fast rule for this. It depends on a number of factors, including how dramatic a change in colour you are trying to achieve, and the type of wood you are working with. Two to three coats are normal, but I would say to just keep going until you achieve a nice even finish and the colour you are looking for.
Should you apply varnish over wood stain? Or wood stain over varnish?
Wood stain over varnish is not a good idea, as the stain can’t soak through the varnish to reach the wood, and won’t adhere well to the varnish. So, if you have varnished wood that you want to stain, it’s best to remove the varnish, using either a chemical product like Polyvine Varnish and Paint Remover, or by sanding. You can, on the other hand, apply varnish over the top of fully cured wood stain; choose a clear varnish suitable to the situation (e.g. internal vs external), to add an extra layer of protection against wear and tear.











0 Comments